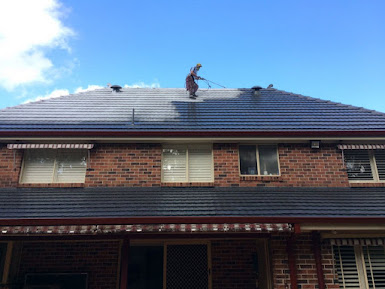
Step-by-Step Guide to DIY Roof Painting in Sydney
Painting your roof in Sydney can be a great way to improve its
appearance and protect it from the elements. Here's a step-by-step guide to
help you tackle this DIY project:
1.
Safety First: Before you begin, prioritize safety. Wear appropriate safety
gear such as gloves, safety goggles, a respirator mask, and sturdy footwear. If
your roof is steep or high, consider using a safety harness or hiring a
professional for assistance.
2.
Clean the Roof: Start by thoroughly cleaning the roof surface to remove dirt,
debris, moss, mold, and mildew. Use a pressure washer or hose with a
high-pressure nozzle to rinse the roof, then scrub stubborn stains with a
mixture of water and detergent. Allow the roof to dry completely before
proceeding.
3.
Repair Any Damage: Inspect the roof for any signs of damage such as cracks,
leaks, or loose shingles. Make necessary repairs before painting to ensure a
smooth and durable finish. Replace damaged shingles, seal cracks with roofing
cement, and secure loose flashing or trim.
4.
Choose the Right Paint: Select a high-quality Roof Restoration Sydney specifically formulated for your type of roofing material (e.g.,
metal, tile, asphalt shingles). Consider factors such as color, durability, UV
resistance, and heat reflection when choosing the paint.
5.
Prepare the Surface: Before painting, prime the roof surface with a suitable primer
to improve adhesion and durability of the paint. Apply the primer evenly using
a paint roller or sprayer, following the manufacturer's instructions. Allow the
primer to dry completely before proceeding.
6.
Apply the Paint: Once the primer is dry, it's time to apply the paint. Stir the
paint thoroughly to ensure uniform consistency, then pour it into a paint tray
or bucket. Use a paint roller, brush, or sprayer to apply the paint evenly to
the roof surface, working in small sections from top to bottom. Be sure to
apply a sufficient coat of paint to achieve the desired coverage and
protection.
7.
Allow for Drying Time: Allow the first coat of paint to dry completely according to
the manufacturer's recommendations before applying additional coats. Depending
on the type of paint and weather conditions, this may take anywhere from a few
hours to a full day.
8.
Apply Additional Coats
(Optional): If necessary, apply additional
coats of paint to achieve the desired color and coverage. Follow the same
application process as before, allowing each coat to dry thoroughly between
applications.
9.
Clean Up: Once you've finished painting, clean up any spills or drips
and properly dispose of used paint cans, brushes, and other materials. Rinse
out paint trays, rollers, and brushes with water or paint thinner, depending on
the type of paint used.
10. Inspect and Maintain: After the
paint has dried completely, inspect the roof for any missed spots or uneven
areas. Touch up any imperfections as needed. Regularly inspect and maintain
your painted roof to ensure its longevity and effectiveness in protecting your
home.
By following these steps and taking appropriate
precautions, you can successfully Roof Painting Sydney as a DIY project in Sydney. However, if you're unsure or uncomfortable
with any aspect of the process, consider hiring a professional roofing
contractor to ensure the job is done safely and effectively.


Comments
Post a Comment